Below are steps to blink Arduino's on-board LED (yellow) using Atmel Studio 7.
Create main.cpp:
#include <avr/io.h>       // For DDRB, PORTB, PORTB5.
#include <avr/sfr_defs.h> // For _BV().
#include <util/delay.h>   // For _delay_ms().

int main(void)
{
	// Set pin connected to on-board LED as output.
	// (ATmega328P pin PB5, Arduino pin 13).
	// Write logic one to bit 5 of port B data-direction register.
	DDRB |= _BV(DDB5); // 0b00100000

	while (true)
	{
		// --------------------------------
		// --- Turn on LED for 1 second ---
		// --------------------------------

		// Drive PB5 high.
		// Write logic one to bit 5 of port B data register.
		PORTB |= _BV(PORTB5); // 0b00100000

		// Wait for 1 second.
		_delay_ms(1000);

		// ---------------------------------
		// --- Turn off LED for 1 second ---
		// ---------------------------------

		// Drive PB5 low.
		// Write logic zero to bit 5 of port B data register.
		PORTB &= ~(_BV(PORTB5)); //0b11011111

		// Wait for 1 second.
		_delay_ms(1000);
	}
}
_delay_ms() requires F_CPU to be defined.
It is the CPU clock frequency in Hz.
Arduino Uno uses an on-board external 16 MHz oscillator.
Either #define F_CPU 16000000UL at the top of above file, or include it in compiler option:
F_CPU=16000000UL: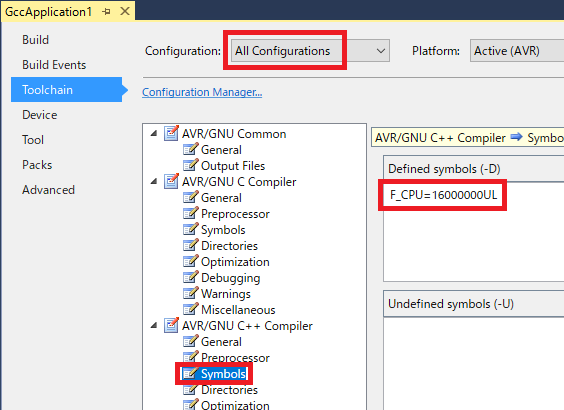
After building the project, upload the HEX file to Arduino. First, register upload command in external tools menu:
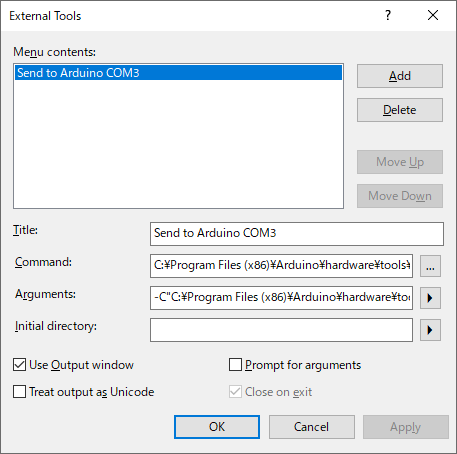
C:\Program Files (x86)\Arduino\hardware\tools\avr\bin\avrdude.exe-C"C:\Program Files (x86)\Arduino\hardware\tools\avr/etc/avrdude.conf" -v -patmega328p -carduino -PCOM3 -b115200 -D -Uflash:w:"$(ProjectDir)Debug\$(TargetName).hex":iThen, execute command:
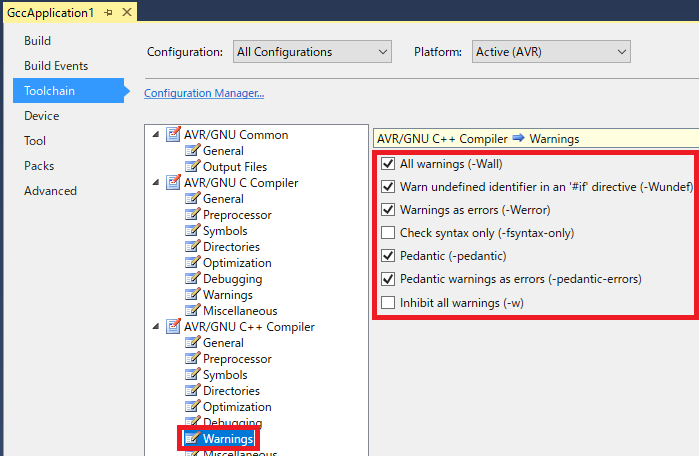
Warnings are helpful for debugging (such as for finding unintended implicit type conversion) but they dissappear after the first compilation with the default settings.
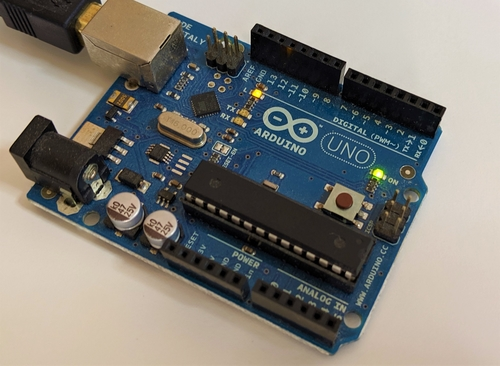
Below is a section of Arduino's schematic diagram. I used Arduino Uno Rev2.
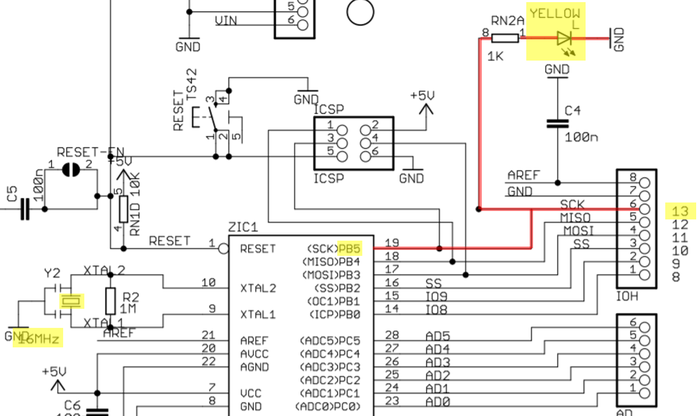
It shows,
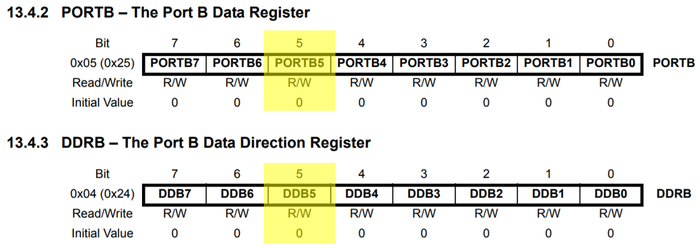
Below is a section from ATmega328P datasheet on I/O port pin PB5.